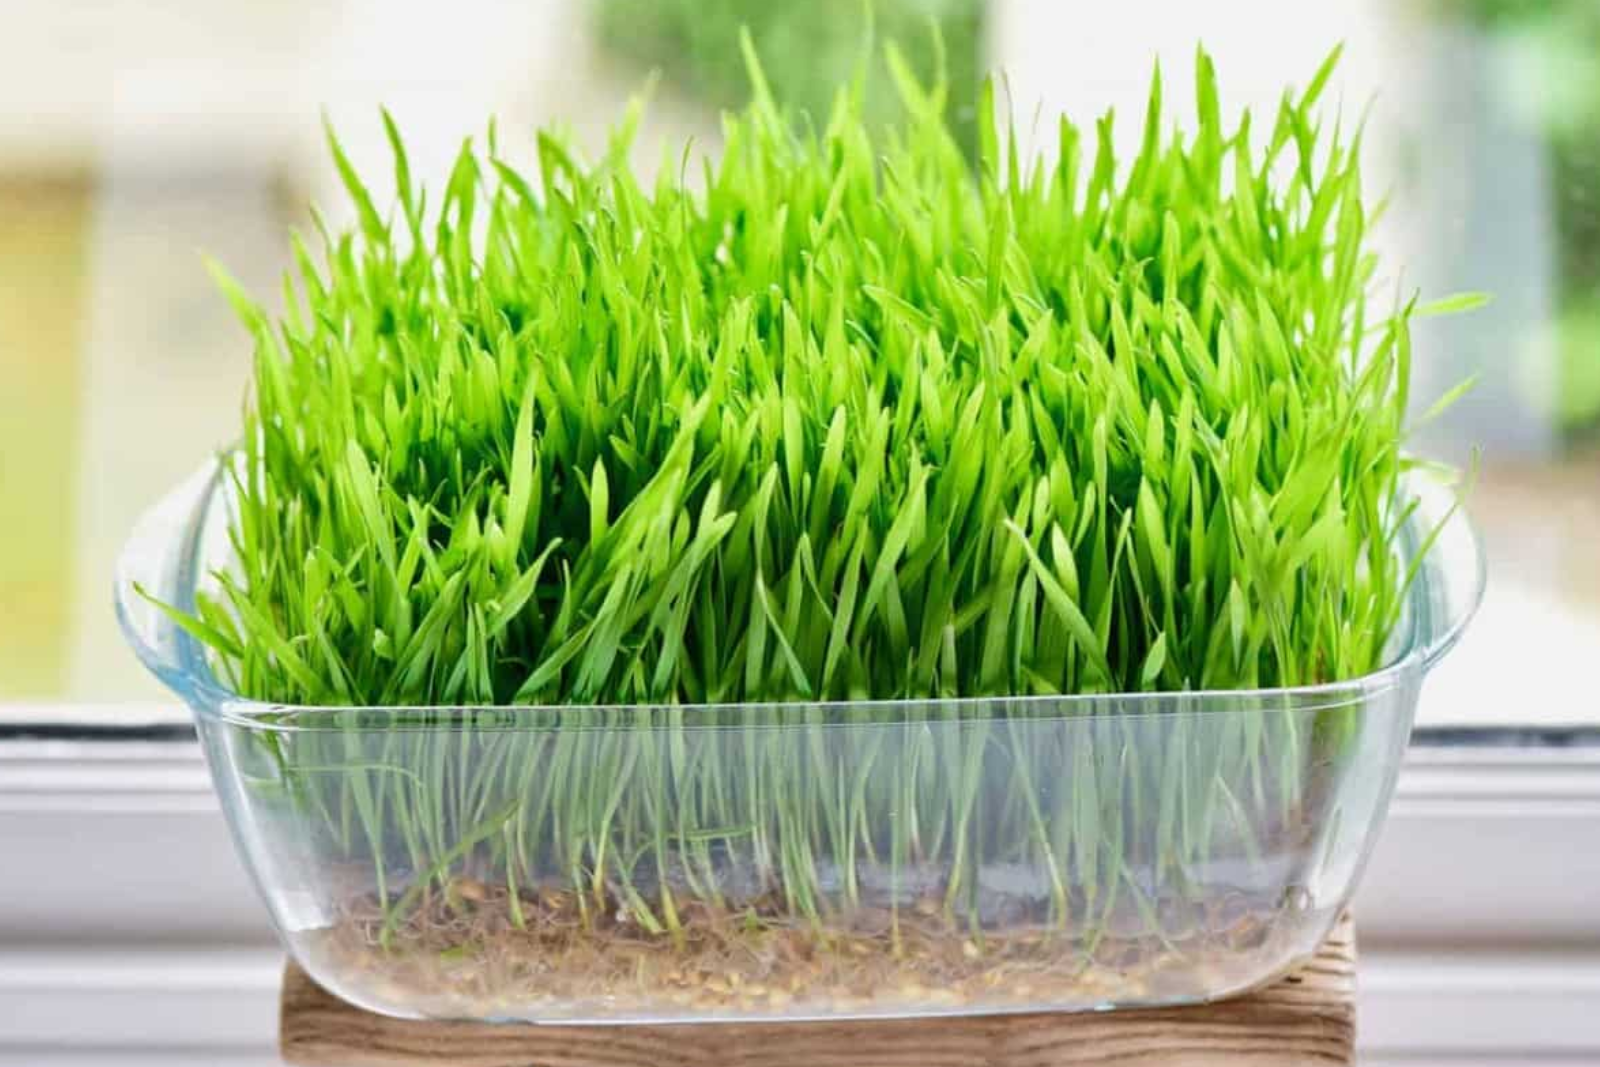
Wheatgrass is a nutrient-rich young grass that comes from the wheat plant. It is highly regarded for its health benefits and is often used in juicing, smoothies, and as a supplement. Freezing wheatgrass can be a convenient way to preserve its freshness and ensure that you have a supply on hand even when it’s not readily available. By following a few simple steps, you can successfully freeze wheatgrass while maintaining its nutritional value. In this article, we will provide a comprehensive guide on how to freeze wheatgrass effectively.
Here’s a step-by-step guide on how to freeze wheatgrass:
Step 1: Harvest fresh wheatgrass
When freezing wheatgrass, it’s crucial to begin with fresh and vibrant greens to ensure the best quality and nutritional value. Harvesting wheatgrass involves cutting it close to the base of the plant when it reaches the desired height, usually around 6-8 inches.
To harvest wheatgrass, you will need a sharp knife or pair of scissors. Gently hold the wheatgrass near the base, and with a swift motion, cut across the stems about half an inch above the soil line. It’s important to avoid cutting too close to the roots to ensure the plant’s regrowth.
When selecting wheatgrass for freezing, look for healthy and well-developed stalks. The leaves should be a vibrant green color, indicating optimal freshness. Avoid any wheatgrass that appears wilted, discolored, or has visible signs of damage.
Harvesting a sufficient amount of wheatgrass is essential to have an ample supply for freezing. Consider the quantity you need for your intended use, whether it’s for juicing, smoothies, or other recipes. Keep in mind that wheatgrass reduces in volume when frozen, so it’s advisable to harvest a slightly larger amount than you initially anticipate.
Step 2: Clean and trim the wheatgrass
After harvesting fresh wheatgrass, the next step is to clean and trim it before freezing. This ensures that any dirt, debris, or potential contaminants are removed, and you freeze only the highest quality wheatgrass.
To clean the wheatgrass, start by placing it under cool running water. Allow the water to gently flow over the stalks, ensuring that every part of the wheatgrass is thoroughly rinsed. This helps remove any soil, dust, or other particles that may be clinging to the leaves and stems.
While washing, gently rub your fingers along the length of the wheatgrass to dislodge any stubborn dirt. Pay extra attention to the base of the stalks, as this area tends to accumulate more debris.
Once the wheatgrass is clean, examine it closely for any damaged, wilted, or discolored parts. These areas may affect the overall quality and taste of the frozen wheatgrass. Using a pair of kitchen scissors or a sharp knife, trim off these undesirable portions. It’s important to remove any parts that appear wilted, brown, or slimy, as they can indicate spoilage or the presence of bacteria.
Step 3 : Blanch the wheatgrass
Blanching wheatgrass is an important step in the freezing process as it helps preserve its color, texture, and nutritional value. By briefly submerging the wheatgrass in boiling water, enzymes and bacteria present on the surface of the greens are deactivated, preventing spoilage and maintaining its freshness.
To begin, fill a large pot with water and place it on the stovetop. Heat the water over high heat until it reaches a rolling boil. The pot should be large enough to comfortably accommodate the wheatgrass without overcrowding.
Once the water is boiling, carefully add the wheatgrass to the pot. Submerge the wheatgrass completely and allow it to blanch for about 30 seconds to 1 minute. This brief blanching process is sufficient to neutralize the enzymes that could cause deterioration and discoloration.
Blanching also helps eliminate surface bacteria that may be present on the wheatgrass. By exposing the greens to high heat, harmful bacteria are effectively destroyed, reducing the risk of contamination during storage.
After the blanching time is complete, promptly remove the wheatgrass from the boiling water. Use a slotted spoon or tongs to lift the greens out, allowing any excess water to drain back into the pot. Be cautious to avoid overcooking the wheatgrass, as prolonged exposure to heat can result in loss of nutrients and a change in texture.
Is it necessary to blanch wheatgrass before freezing?
Blanching wheatgrass before freezing is recommended to deactivate enzymes and bacteria, preserving its color, texture, and nutritional value. However, some individuals prefer to freeze wheatgrass without blanching for immediate use in recipes like smoothies or juices.
Step 4: Cool and dry the wheatgrass
After blanching the wheatgrass, it’s important to cool it down rapidly and remove any excess moisture before freezing. This step helps maintain the texture and quality of the wheatgrass during storage.
To cool the wheatgrass, prepare a bowl filled with ice water. Using a slotted spoon or tongs, transfer the blanched wheatgrass from the boiling water directly into the bowl of ice water. The ice water rapidly reduces the temperature of the greens, halting the cooking process and preserving their vibrant color.
Allow the wheatgrass to sit in the ice water for a few minutes, ensuring it is fully cooled. This step also helps retain the crispness and nutritional content of the greens. Once cooled, remove the wheatgrass from the ice water.
Next, it’s essential to drain any excess water from the wheatgrass. Gently lift the greens out of the ice water and let them drain over the bowl or a colander. This allows the water to run off and prevents it from diluting the flavors or causing ice crystals during freezing.
To further remove moisture, gently pat the wheatgrass dry using a clean kitchen towel or paper towels. Take care to be gentle and avoid crushing or damaging the delicate greens. Dabbing the wheatgrass helps eliminate surface moisture, reducing the risk of ice formation and freezer burn.
Step 5: Portion and package the wheatgrass
After cooling and drying the wheatgrass, the next step is to portion and package it for freezing. Dividing the wheatgrass into individual portions or desired serving sizes allows for convenient thawing and usage in the future. Proper packaging also helps protect the wheatgrass from freezer burn and maintain its quality.
Start by deciding on the portion sizes that best suit your needs. Consider how you intend to use the wheatgrass, whether in smoothies, juices, or recipes, and portion accordingly. Smaller portions are generally more convenient, as you can thaw only what you need without defrosting the entire batch.
Once the wheatgrass is portioned, it’s important to choose suitable packaging materials. Opt for airtight freezer-safe containers or resealable freezer bags to minimize exposure to air and moisture. Make sure the containers or bags are designed for freezer use to maintain the quality of the wheatgrass for an extended period.
For individual portions, place each portion of wheatgrass into separate containers or bags. This prevents clumping and allows for easy separation when you need to thaw and use a specific amount. Ensure that the containers or bags are properly sealed to prevent air and moisture from entering.
Step 6: Label and date the packages
Labeling and dating the wheatgrass packages before placing them in the freezer is an essential step in organizing your frozen storage. By providing clear information about the contents and freezing date, you can easily keep track of the wheatgrass’s freshness and identify it when needed.
When labeling the packages, clearly indicate the contents as “Wheatgrass.” This makes it easy to distinguish the wheatgrass from other frozen items in your freezer. Additionally, if you have multiple types of frozen greens or herbs, labeling them individually helps prevent confusion.
Including the date of freezing is equally important. Write the specific date on which you froze the wheatgrass on each package. This allows you to keep track of how long the wheatgrass has been in the freezer and practice proper rotation by using the oldest packages first.
Keeping track of the freezing date helps you maintain the wheatgrass’s quality and nutritional value. It allows you to prioritize consuming the older packages to ensure they are used before any potential degradation in taste or texture occurs.
Labeling and dating the packages also make it easier to plan your meals and recipes. By knowing the freezing date, you can calculate how long the wheatgrass has been in the freezer and determine the appropriate amount to thaw for your intended use.
Step 7: Freeze the wheatgrass
Once you have properly packaged the wheatgrass portions, the next step is to freeze them. Proper freezing ensures the long-term preservation of the wheatgrass while maintaining its quality. Here’s how to freeze the wheatgrass effectively:
- Place the packaged wheatgrass portions in the freezer: Carefully arrange the packages in a single layer on a flat surface in the freezer. This allows for faster and more efficient freezing. Avoid overcrowding the packages or stacking them on top of each other, as this can lead to uneven freezing and potential clumping.
- Lay them flat: It is recommended to lay the packages flat in the freezer. This prevents the wheatgrass portions from sticking together, making it easier to remove individual portions as needed. Flat storage also helps maintain the shape and integrity of the wheatgrass, minimizing any potential damage or breakage during freezing.
- Allow space between packages: Ensure there is sufficient space between the packages to allow air circulation. Adequate airflow promotes even freezing and helps maintain the quality of the wheatgrass. If needed, you can use freezer dividers or arrange the packages in different areas of the freezer to ensure proper airflow.
Step 8: Store in the freezer
After placing the packaged wheatgrass portions in the freezer, it’s important to let them remain undisturbed for a sufficient period to ensure they are fully frozen. Here’s how to store the wheatgrass in the freezer:
- Freeze for at least 24 hours: Leave the wheatgrass in the freezer for a minimum of 24 hours. This duration allows ample time for the wheatgrass to freeze completely. Freezing is essential for long-term preservation and maintaining the quality of the wheatgrass.
- Ensure full freezing: Check that the wheatgrass portions are fully frozen before making any adjustments. Frozen wheatgrass should be solid and firm to the touch. If you are unsure whether they are fully frozen, you can leave them in the freezer for a longer duration to be certain.
- Stack packages to save space: Once the wheatgrass portions are fully frozen, you can stack them to save space in the freezer if needed. Stacking can be done carefully, ensuring that the packages are stable and secure. However, avoid excessive stacking, as it may lead to crushing or damage to the wheatgrass.
Stacking the packages helps optimize the use of space in your freezer, especially if you have limited storage capacity. By stacking them, you can create neat layers and utilize the vertical space efficiently.
How long can I store frozen wheatgrass?
When stored properly in airtight containers or freezer bags, frozen wheatgrass can maintain its quality for approximately 6 to 12 months. However, for the best taste and nutritional value, it is advisable to consume the wheatgrass within the first 3-6 months of freezing.
Other related questions
How do I defrost wheatgrass?
To defrost wheatgrass, follow these steps:
- Remove from the freezer: Take the desired portion or package of frozen wheatgrass out of the freezer. Keep in mind that it’s best to thaw only the amount you need to minimize waste.
- Transfer to the refrigerator: Place the frozen wheatgrass in a container or on a plate and transfer it to the refrigerator. Thawing in the refrigerator is the recommended method as it allows for a gradual thawing process, preserving the texture and quality of the wheatgrass.
- Allow time to thaw: Depending on the size of the portion and the temperature of your refrigerator, it may take anywhere from a few hours to overnight for the wheatgrass to fully thaw. Be patient and avoid rushing the process by using heat or warm water, as this can negatively impact the quality.
- Gently separate and use: Once the wheatgrass has thawed completely, gently separate the stalks if they have clumped together. You can use your fingers or a fork to carefully separate them without damaging the delicate greens.
- Use as desired: The thawed wheatgrass can now be used in your preferred recipes, such as juicing, smoothies, or as an ingredient in salads or other dishes. Ensure that you use the thawed wheatgrass within a couple of days for the best flavor and freshness.
How can I thaw frozen wheatgrass quickly?
The recommended method for thawing frozen wheatgrass is to transfer it from the freezer to the refrigerator and allow it to thaw gradually. However, if you need to thaw it quickly, you can place the sealed package in a bowl of cold water, replacing the water every 15-30 minutes until thawed. Avoid using warm or hot water as it may negatively affect the quality of the wheatgrass.
Can I refreeze wheatgrass?
No, it is not recommended to refreeze wheatgrass once it has been thawed. Thawed wheatgrass has a shorter shelf life and should be consumed promptly to maintain its quality and nutritional benefits. Refreezing can lead to a loss of texture, taste, and overall quality.
How do I know if the wheatgrass has gone bad after being frozen?
To determine if frozen wheatgrass has gone bad, observe changes in its appearance, texture, and odor. If the wheatgrass has developed a slimy or mushy texture, has a foul smell, or shows signs of discoloration such as browning or yellowing, it may indicate spoilage. Additionally, any off-putting or unusual taste is another indication that the wheatgrass has gone bad.


