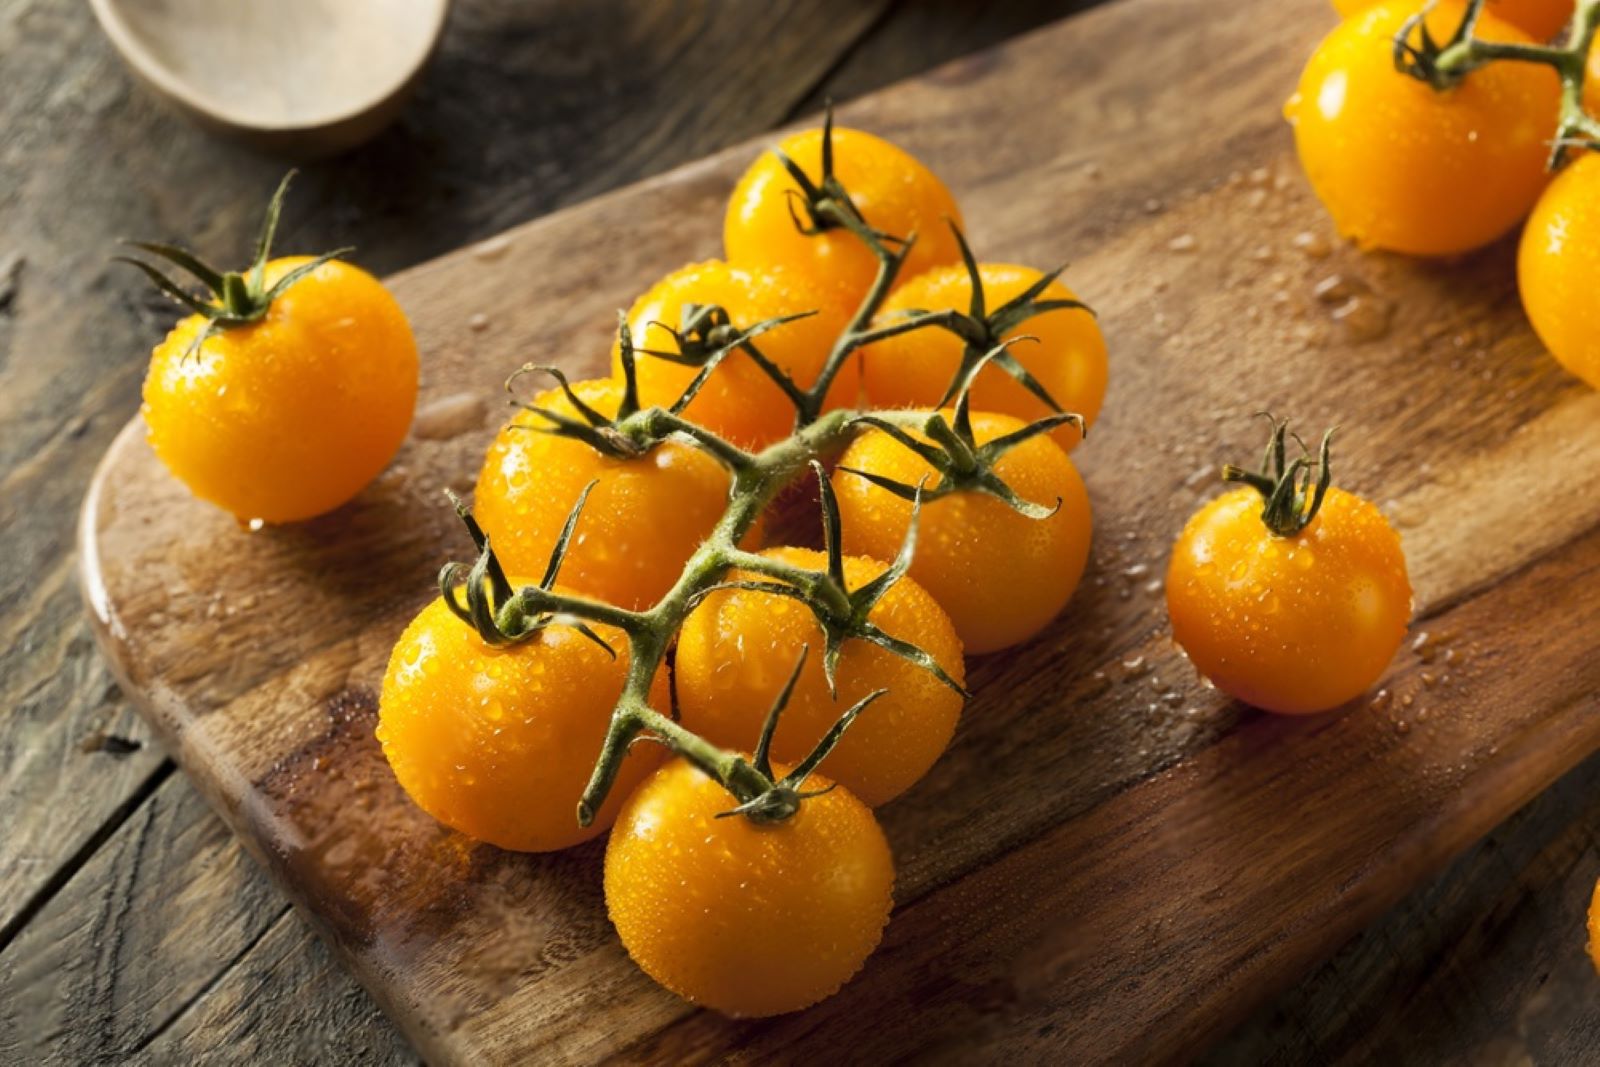
Yellow tomatoes, with their sunny color and sweet flavor, are a delightful and vibrant addition to any culinary creation. These golden gems offer a refreshing and unique twist to traditional red tomatoes, bringing a burst of sweetness and a touch of sunshine to our plates. Whether used fresh in salads, roasted to perfection, or blended into flavorful sauces, yellow tomatoes showcase their versatility and appeal to both professional chefs and home cooks alike. As part of the tomato family, yellow tomatoes provide a wealth of essential nutrients and antioxidants, making them not only delicious but also a nutritious choice. However, when yellow tomatoes are in abundance during their peak season or when purchased in larger quantities, it may be challenging to consume them all before they begin to soften or overripe. Freezing yellow tomatoes becomes a practical and efficient method to preserve their delightful taste and tender texture, ensuring that each tomato retains its juicy sweetness and enhances your meals with a touch of sun-ripened goodness, even when fresh yellow tomatoes are not readily available or when you wish to enjoy these delightful fruits at your convenience. In this guide, we will explore the best practices for freezing yellow tomatoes, allowing you to savor their delightful taste and elevate your culinary creations with the essence of these golden and nutritious fruits.
Here are the simple steps to freeze yellow tomatoes:
- Step 1: Select Ripe and Fresh Yellow Tomatoes
- Step 2: Wash and Remove the Cores
- Step 3: Blanch the Yellow Tomatoes (optional)
- Step 4: Peel the Tomatoes (optional)
- Step 5: Dice or Slice the Tomatoes
- Step 6: Arrange the Tomatoes for Freezing
- Step 7: Flash-Freeze the Yellow Tomatoes
- Step 8: Package and Seal the Tomatoes
- Step 9: Label and Date the Packages
- Step 10: Store in the Freezer
Step 1: Select Ripe and Fresh Yellow Tomatoes
Selecting ripe and fresh yellow tomatoes is a crucial first step when preparing to freeze them. The quality of the tomatoes you choose will directly impact the final taste and texture after freezing. Here’s why it’s essential to opt for ripe and fresh tomatoes:
- Flavor and Texture: Ripe yellow tomatoes are at their peak flavor, boasting a sweet and slightly tangy taste. They also have a firm yet tender texture, which contributes to their overall appeal in various dishes. Freezing tomatoes that are overripe or underripe may result in a loss of flavor and a mushy texture.
- Nutritional Value: Ripe tomatoes are known to be rich in vitamins, minerals, and antioxidants. They are a great source of vitamin C, vitamin A, potassium, and other essential nutrients. By choosing ripe tomatoes for freezing, you preserve their nutritional value, making them a healthy addition to your meals even during the off-season.
- Freezing Process: High-quality tomatoes freeze better, ensuring that the cell structure remains intact during freezing and thawing. This helps to retain their original texture and prevent them from turning into a watery mess when thawed.
- Minimal Blemishes: Opt for yellow tomatoes that are free of significant blemishes, bruises, or mold. While small imperfections can be cut away during preparation, tomatoes with extensive damage may lead to a loss of flavor and increase the risk of spoilage during freezing.
To identify ripe and fresh yellow tomatoes, keep the following tips in mind:
- Look for vibrant and uniform yellow coloration across the entire tomato’s surface.
- Gently squeeze the tomatoes; they should be firm yet yield slightly to pressure, indicating ripeness.
- Check the stem area; it should be green and firmly attached to the fruit, a sign of freshness.
- Avoid tomatoes with soft spots, wrinkles, or signs of mold, as these indicate deterioration.
By carefully selecting ripe and fresh yellow tomatoes, you set the foundation for a successful freezing process. These quality tomatoes will preserve their delicious flavor and texture, ensuring that you can enjoy the taste of summer even during the colder months when fresh tomatoes are not readily available.
Step 2: Wash and Remove the Cores
Properly washing and removing the cores of yellow tomatoes is an essential step in the freezing process. It serves both practical and hygiene purposes, ensuring that the tomatoes are clean and ready for freezing and subsequent culinary use. Here’s why this step is crucial:
- Removing Dirt and Residues: Washing the yellow tomatoes under cool running water helps eliminate any dirt, dust, or residues that might be present on the skin. This is especially important if the tomatoes were grown outdoors or purchased directly from a market, as they may have come into contact with soil or other contaminants.
- Food Safety: Washing the tomatoes is an essential practice for maintaining food safety. It minimizes the risk of bacterial contamination, which can lead to foodborne illnesses. Even though tomatoes have protective skins, it’s still essential to wash them thoroughly to ensure the safety of the final frozen product.
- Removing Cores for Better Texture: The core of a tomato is the tough, fibrous part located around the stem area. By gently removing the cores using a sharp knife, you eliminate any potentially unpleasant texture that might result from freezing this part. The cores are not as tender as the rest of the tomato, and removing them ensures a consistent texture throughout the frozen tomatoes.
- Easy Preparation for Culinary Use: Preparing the tomatoes for future culinary use becomes much more convenient when the cores are removed. Whether you plan to use the frozen yellow tomatoes in sauces, soups, stews, or other dishes, not having to deal with the cores simplifies the cooking process and enhances the overall dining experience.
Here’s a step-by-step guide on how to wash and remove the cores of yellow tomatoes:
- Rinse the tomatoes: Hold each yellow tomato under cool running water and gently rub the surface with your fingers to remove any surface dirt or residues. Avoid using soap or detergents, as they may leave behind harmful residues.
- Pat them dry: After washing, gently pat the tomatoes dry with a clean kitchen towel or paper towels. Drying them helps remove excess moisture, which can cause ice crystals to form during freezing.
- Remove the cores: Lay the tomato on its side and use a sharp knife to carefully cut around the stem area in a circular motion, angling the knife slightly inward. Remove the core and any tough parts, leaving behind the juicy and flavorful part of the tomato.
By washing and removing the cores of yellow tomatoes, you ensure that they are clean, safe, and ready for the freezing process. This step sets the stage for preserving the natural goodness and taste of the tomatoes, making them a delightful addition to your culinary creations, even when they are not in season.
Step 3: Blanch the Yellow Tomatoes (optional)
Blanching is an additional step that you can choose to incorporate into the freezing process for yellow tomatoes. While it is not mandatory, blanching offers certain benefits that can enhance the final texture, color, and overall quality of the frozen tomatoes. Here’s why blanching is considered an optional but useful technique:
- Texture Preservation: Blanching helps preserve the firmness and structure of the yellow tomatoes. When tomatoes are exposed to high temperatures during blanching, enzymes responsible for softening the fruit are inactivated. This process helps retain the tomatoes’ crispness and prevents them from becoming overly mushy when thawed and used in various dishes.
- Skin Removal (if desired): Blanching makes it easier to peel the skin off the tomatoes. The brief exposure to boiling water loosens the skin, which can then be easily removed after cooling in the ice water. If you prefer skinless yellow tomatoes for your culinary endeavors, blanching simplifies the peeling process.
- Color Retention: Yellow tomatoes, like many fruits and vegetables, contain pigments responsible for their vibrant color. Blanching helps lock in these pigments, preventing the tomatoes from losing their bright hue during freezing. This ensures that the frozen tomatoes will retain their appealing visual appeal when used in your recipes.
Here’s a step-by-step guide on how to blanch yellow tomatoes:
- Prepare a large pot of boiling water: Fill a large pot with water and bring it to a rolling boil. Ensure that there is enough water to submerge the tomatoes completely.
- Set up an ice water bath: While the water is boiling, prepare a bowl of ice water. This will be used to rapidly cool down the tomatoes after blanching to stop the cooking process.
- Score the bottom of the tomatoes (optional): To make peeling easier, you can score a small “X” on the bottom of each tomato using a sharp knife. This will help loosen the skin during blanching.
- Blanch the tomatoes: Carefully lower the yellow tomatoes into the boiling water using a slotted spoon. Let them blanch for about 30 seconds to 1 minute. The exact time may vary depending on the size and ripeness of the tomatoes.
- Transfer to ice water: Quickly remove the tomatoes from the boiling water and place them immediately in the ice water bath. This rapid cooling halts the cooking process and helps preserve the tomatoes’ texture and color.
- Peel (if desired): After the tomatoes have cooled in the ice water for a few minutes, the skin should be easy to peel off. Gently remove the skin using your fingers or a knife.
- Drain and pat dry: Once blanched and, if applicable, peeled, place the yellow tomatoes on a clean kitchen towel or paper towels to drain any excess water.
While blanching is optional, it can be particularly beneficial if you plan to use the frozen yellow tomatoes for specific culinary applications or if you want to ensure the best possible texture and appearance after thawing. By following these blanching steps, you can tailor the freezing process to your preferences and ultimately create frozen yellow tomatoes that are both visually appealing and delectably delicious.
Step 4: Peel the Tomatoes (optional)
Peeling yellow tomatoes is an optional step in the freezing process and is particularly useful for those who prefer skinless tomatoes in their culinary preparations. While the skin of yellow tomatoes is edible and holds valuable nutrients, some recipes and personal preferences may call for tomatoes without their skins. Here’s why peeling is optional and how blanching facilitates this process:
- Personal Preference: The decision to peel yellow tomatoes largely depends on personal taste and the specific culinary uses. Some individuals prefer the smoother texture and appearance of skinless tomatoes in certain dishes, while others don’t mind the skin and appreciate the added nutrients and texture it provides.
- Enhanced Texture: By peeling the tomatoes, you create a smoother and more consistent texture, especially important in recipes like sauces and purees, where a velvety texture is desired.
- Blanched Skin: The blanching process softens the skin of the yellow tomatoes, making it much easier to peel. The brief exposure to boiling water causes the skin to loosen, allowing you to remove it effortlessly.
Here’s a step-by-step guide on how to peel yellow tomatoes after blanching:
- Blanch the tomatoes (if not done already): As mentioned earlier, blanch the yellow tomatoes by placing them in boiling water for about 30 seconds to 1 minute and then transferring them to an ice water bath to cool.
- Remove the tomatoes from the ice water: Once the tomatoes have cooled down in the ice water, take them out and pat them dry with a clean kitchen towel or paper towels.
- Start peeling: To begin peeling the tomatoes, you can use a small, sharp knife or your fingers. The skin should be noticeably loosened from the blanching process, making it relatively easy to remove.
- Use a knife (optional): If you prefer using a knife, make a small incision or cut in the skin near the scored “X” (if you scored the tomatoes before blanching). Then, gently peel back the skin with your fingers from the incision.
- Use your fingers (optional): If you’re comfortable using your fingers, you can simply pinch and peel the skin away from the flesh of the tomato. The blanching process should make the skin come off quite easily.
- Continue peeling: Work your way around the tomato, peeling off the skin completely. Be gentle to avoid damaging the tender flesh of the tomato.
- Dispose of the skin: Once you have peeled all the tomatoes, you can discard the skin or use it in compost.
Remember that peeling is optional, and if you prefer to keep the skin on the yellow tomatoes, you can skip this step entirely. Whether you choose to peel the tomatoes or not, the blanching process helps to maintain the tomatoes’ overall texture and appearance, ensuring that they freeze well and remain enjoyable in your favorite dishes.
Step 5: Dice or Slice the Tomatoes
Once you have prepared and peeled the yellow tomatoes, the next step is to decide how you want to freeze them based on your future culinary needs. You have the option to freeze the tomatoes whole, diced, or sliced, and each choice offers distinct advantages depending on the dishes you plan to prepare. Here’s why this step is important and how it impacts your cooking:
- Versatility: Diced or sliced yellow tomatoes offer greater versatility in the kitchen. By cutting the tomatoes into smaller pieces, you can use them in a wide range of dishes, such as sauces, stews, soups, salads, and more. The smaller size ensures that they blend well with other ingredients and distribute their flavor evenly throughout the dish.
- Convenience: Freezing diced or sliced tomatoes makes meal preparation more convenient. When you need to add tomatoes to a recipe, you can easily grab the desired amount from the freezer, saving you time and effort in the kitchen. It also allows you to use just the right amount, minimizing waste.
- Cooking Time: Smaller pieces of tomatoes thaw and cook faster, which can be beneficial when you’re in a hurry or preparing quick meals. This can be especially helpful for busy cooks who need to whip up a delicious meal without spending too much time on prep.
Here’s how you can dice or slice the yellow tomatoes for freezing:
- Prepare a cutting board and a sharp knife: To dice or slice the tomatoes, you’ll need a clean cutting board and a sharp knife. Ensure that the knife is appropriate for cutting through the tomatoes without crushing them.
- Decide on the size: Determine the size you want for your diced or sliced tomatoes. Common sizes for diced tomatoes are usually around 1/2 inch to 1 inch cubes, while slices can be 1/4 to 1/2 inch thick, depending on your preference.
- Dice the tomatoes: To dice the tomatoes, cut them crosswise into slices first. Then, stack a few slices on top of each other and cut them into strips. Finally, cut across the strips to create cubes.
- Slice the tomatoes: To slice the tomatoes, simply cut them into even, thin slices.
- Arrange the pieces for freezing: Place the diced or sliced tomatoes on a baking sheet or tray in a single layer. This prevents them from sticking together during freezing and makes it easier to portion them later.
- Flash-freeze the pieces: Put the baking sheet or tray with the arranged tomato pieces into the freezer. Allow them to freeze for about 1 to 2 hours or until they are firm and solid.
- Package and label: Transfer the frozen diced or sliced tomatoes into freezer-safe containers or resealable plastic bags. Label each container or bag with the contents and date for easy identification.
By dicing or slicing the yellow tomatoes before freezing, you open up a world of culinary possibilities. Whether you want to add them to a comforting stew, a zesty pasta sauce, or a refreshing summer salad, having diced or sliced tomatoes at your fingertips will elevate your dishes and make meal preparation a breeze.
Step 6: Arrange the Tomatoes for Freezing
Arranging the prepared yellow tomatoes in a single layer on a baking sheet or tray is a crucial step in the freezing process. Properly spacing out the tomatoes ensures that they freeze quickly and evenly, which is essential for preserving their texture and quality. Here’s why this step is important and how it impacts the freezing process:
- Faster Freezing: Placing the tomatoes in a single layer with enough space between them allows the cold air in the freezer to circulate around each tomato. This results in faster freezing, reducing the amount of time the tomatoes spend at a temperature where spoilage or ice crystal formation is likely.
- Even Freezing: Overcrowding the tomatoes can cause them to freeze together or stick to one another, creating a clumped mass of tomatoes. By arranging them in a single layer, you ensure that each tomato freezes individually, preventing them from sticking together. This makes it easier to remove just the desired amount of tomatoes from the freezer when needed.
- Quality Preservation: Rapid and even freezing helps preserve the overall quality of the yellow tomatoes. When tomatoes freeze too slowly or unevenly, ice crystals can form inside the cells, damaging the cell walls and leading to a mushy texture when thawed.
Here’s a step-by-step guide on how to arrange the yellow tomatoes for freezing:
- Prepare a clean baking sheet or tray: Use a baking sheet or tray that fits comfortably inside your freezer. You can line it with parchment paper or a silicone baking mat to prevent the tomatoes from sticking.
- Space out the tomatoes: Carefully place the prepared yellow tomatoes on the baking sheet or tray in a single layer, leaving some space between each tomato. Make sure they are not touching or overlapping.
- Avoid stacking or piling: Refrain from stacking multiple layers of tomatoes on top of each other. Stacking can lead to uneven freezing and increase the risk of tomatoes sticking together.
- Use multiple trays if necessary: If you have a large quantity of tomatoes to freeze, you may need to use multiple baking sheets or trays. This allows for better air circulation and more efficient freezing.
- Keep the tray flat: Ensure that the baking sheet or tray remains flat and level while in the freezer. This prevents the tomatoes from sliding around and maintains their position for even freezing.
- Flash-freeze the tomatoes: Once the tomatoes are arranged on the baking sheet or tray, put it into the freezer. Allow the tomatoes to freeze for about 1 to 2 hours or until they are firm and solid.
- Transfer to storage containers: After flash-freezing, transfer the frozen yellow tomatoes into freezer-safe containers or resealable plastic bags. Label each container or bag with the contents and date for easy identification.
By arranging the yellow tomatoes in a single layer on a baking sheet or tray for freezing, you ensure that they freeze quickly, evenly, and maintain their quality for future use. Properly frozen tomatoes will be a valuable addition to your cooking endeavors, providing bursts of sunny flavor and color to your favorite dishes throughout the year.
Step 7: Flash-Freeze the Yellow Tomatoes
Flash-freezing is a crucial step in the freezing process that involves rapidly freezing the prepared yellow tomatoes. By placing them on a baking sheet or tray and exposing them to extremely cold temperatures for a short period, you effectively freeze the tomatoes individually. This process offers several benefits and ensures that the frozen tomatoes maintain their individual shapes and don’t stick together in the final storage container. Here’s why flash-freezing is important and how it helps preserve the quality of the frozen tomatoes:
- Prevents Clumping: When you freeze the tomatoes individually, they remain separate from each other. This prevents them from clumping together in the final storage container, allowing you to easily take out the desired amount of tomatoes without having to thaw the entire batch.
- Preserves Texture: Flash-freezing helps preserve the natural texture of the yellow tomatoes. By freezing them quickly, ice crystals have less time to form, which minimizes the risk of cell damage and mushiness when thawed.
- Speedy Freezing: Flash-freezing is a rapid freezing process that quickly brings the internal temperature of the tomatoes to freezing levels. This prevents any potential degradation of quality during the freezing process and ensures that the tomatoes freeze uniformly.
Here’s a step-by-step guide on how to flash-freeze the yellow tomatoes:
- Arrange the tomatoes for freezing: As mentioned in Step 6, place the prepared yellow tomatoes in a single layer on a baking sheet or tray, ensuring they are not touching or overlapping.
- Transfer to the freezer: Carefully place the baking sheet or tray with the tomatoes into the freezer. Position it on a flat surface to prevent the tomatoes from sliding around during freezing.
- Freeze for 1 to 2 hours: Allow the tomatoes to freeze in the freezer for approximately 1 to 2 hours, or until they are firm and solid. The exact freezing time may vary based on the size and ripeness of the tomatoes.
- Check for firmness: After the recommended time has passed, check the tomatoes by gently pressing on them. They should feel firm and not yield to pressure.
- Package for final storage: Once the tomatoes are fully frozen, quickly transfer them into freezer-safe containers or resealable plastic bags. Remember to label each container or bag with the contents and date for easy identification.
By flash-freezing the yellow tomatoes, you ensure that they maintain their individuality during the freezing process and stay in prime condition for future use. When you’re ready to use the frozen tomatoes, you can effortlessly take out the exact amount you need, preserving the rest for future culinary endeavors. Flash-frozen yellow tomatoes will be a delightful addition to your dishes, infusing them with the sunny flavors of summer all year round.
Step 8: Package and Seal the Tomatoes
After flash-freezing the yellow tomatoes and ensuring they are firm and solid, it’s time to package and seal them properly for long-term storage in the freezer. This step is crucial in preserving the quality and preventing freezer burn. By using freezer-safe containers or resealable plastic bags, you create an airtight environment that helps maintain the tomatoes’ flavor, texture, and overall quality during freezing. Here’s why this step is essential and how it impacts the preservation of the frozen tomatoes:
- Prevents Freezer Burn: Freezer burn occurs when frozen food is exposed to air, leading to dehydration and loss of quality. Properly sealed containers or bags prevent air from coming into contact with the tomatoes, reducing the risk of freezer burn and preserving their taste and texture.
- Maintains Freshness: By squeezing out any excess air from the packaging, you create a tighter seal that helps maintain the freshness of the tomatoes. This ensures that when you thaw and use the tomatoes, they taste as close to fresh as possible.
- Air Removal with a Vacuum Sealer: Using a vacuum sealer can be particularly effective in removing air from the packaging. By removing the air, you further minimize the risk of freezer burn and extend the shelf life of the frozen tomatoes.
Here’s a step-by-step guide on how to package and seal the flash-frozen yellow tomatoes:
- Gather freezer-safe containers or resealable plastic bags: Make sure the containers or bags you use are designed for freezer storage to withstand low temperatures without becoming brittle or cracking.
- Transfer the tomatoes: Carefully transfer the flash-frozen yellow tomatoes into the containers or bags. Leave some space at the top to allow for expansion during freezing.
- Squeeze out excess air: If using resealable plastic bags, gently squeeze out as much air as possible before sealing the bags. For containers, press down on the tomatoes slightly to eliminate air gaps before sealing the lids.
- Use a vacuum sealer (optional): If you have a vacuum sealer, you can use it to remove air more effectively from the bags. Place the bag into the vacuum sealer and let it remove the air before sealing the bag tightly.
- Stack and store in the freezer: Once the tomatoes are properly packaged and sealed, stack the containers or bags neatly in the freezer. Place them in the coldest part of the freezer for optimal storage.
By packaging and sealing the flash-frozen yellow tomatoes correctly, you ensure that they stay in excellent condition during their time in the freezer. Whether you use them in soups, sauces, stews, or other dishes, the well-preserved tomatoes will add a burst of sunny flavor and color to your culinary creations throughout the year.
Step 9: Label and Date the Packages
Labeling and dating the packages of frozen yellow tomatoes is a crucial step in the freezing process that provides organization and ensures that you can easily identify the contents and their freezing dates in the future. Keeping track of this information is essential for maintaining food safety, quality, and overall culinary efficiency. Here’s why labeling and dating the packages is important and how it benefits your future cooking endeavors:
- Identification: As time passes, it may become challenging to remember the contents of each container or bag in your freezer. Labeling each package with a description of the frozen yellow tomatoes helps you quickly identify what’s inside without having to open and inspect every container.
- Prevents Waste: By dating the packages, you can keep track of how long the yellow tomatoes have been in the freezer. This prevents the risk of consuming expired or suboptimal-quality tomatoes, allowing you to use them before they deteriorate in taste or texture.
- Ensures Freshness: The freezing process preserves the tomatoes at their peak quality, but it’s still essential to use them within a reasonable time frame for the best flavor and texture. Labeling the packages with freezing dates helps you prioritize the use of older tomatoes first, ensuring you enjoy them while they are still at their best.
Here’s how to label and date the packages of frozen yellow tomatoes:
- Use a waterproof marker or freezer-safe labels: Ensure that the marker or labels you use are waterproof and can withstand the low temperatures of the freezer without smudging or fading.
- Write a description: On each container or bag, write a brief description of the contents, such as “Diced Yellow Tomatoes” or “Sliced Yellow Tomatoes.” This makes it easy to identify the type of tomatoes without opening the package.
- Include the freezing date: Write the current date on each package, indicating when the yellow tomatoes were frozen. For example, you can write “Frozen on [Date]” or simply “Froze on [Date].”
- Use a consistent format: Maintain a consistent labeling format throughout all the packages to make it easier to locate specific tomatoes when needed.
- Keep the labels visible: Place the labels where they are easily visible on the containers or bags, so you can quickly identify the contents without having to move or rearrange items in the freezer.
By labeling and dating the packages of frozen yellow tomatoes, you ensure that your freezer stays organized and efficient. When you’re ready to use the tomatoes, you can easily locate the desired package based on its description and freezing date. This simple yet effective step enhances your cooking experience, allowing you to enjoy the delicious taste of summer’s golden bounty in various dishes whenever you please.
Step 10: Store in the Freezer
Storing the labeled and properly packaged yellow tomatoes in the freezer is the final step in the freezing process. It is crucial to place them in the coldest part of the freezer to ensure optimal preservation and to extend their shelf life. Here’s why storing the frozen yellow tomatoes correctly is important and how it impacts their overall quality:
- Temperature Stability: The coldest part of the freezer maintains a more consistent and stable temperature, minimizing temperature fluctuations that can affect the quality of frozen food. This ensures that the yellow tomatoes freeze and stay at an ideal temperature for long-term storage.
- Prevents Freezer Burn: Properly sealed and stored containers or bags in the coldest part of the freezer reduce the risk of freezer burn. Freezer burn occurs when food is exposed to air and becomes dehydrated, leading to a loss of flavor and texture.
- Shelf Life: When stored properly, frozen yellow tomatoes can maintain their quality for an extended period. The optimal storage conditions in the coldest part of the freezer help preserve their taste, texture, and nutritional value for up to 8 to 12 months.
Here’s how to store the frozen yellow tomatoes in the freezer:
- Arrange the labeled packages in the coldest part: Identify the coldest part of your freezer, typically located toward the back or bottom. Arrange the labeled containers or bags in this area, making sure they are not overcrowded.
- Avoid frequent opening and closing: Minimize the number of times you open the freezer door to maintain a consistent temperature inside. Frequent opening and closing can lead to temperature fluctuations, affecting the quality of the frozen tomatoes.
- Keep track of storage time: Since frozen yellow tomatoes have a shelf life of 8 to 12 months when stored properly, it’s helpful to keep track of when you initially froze them. This way, you can prioritize using the older packages first to avoid wasting any tomatoes.
- Store separately from strong-smelling foods: If you plan to store other strong-smelling foods in the freezer, consider keeping the yellow tomatoes in a separate area or container. This prevents the transfer of odors, ensuring the tomatoes retain their natural flavor.
By storing the labeled and properly sealed frozen yellow tomatoes in the coldest part of the freezer, you ensure that they remain in excellent condition for an extended period. Whenever you need to add the sunny flavors of yellow tomatoes to your dishes, you can confidently reach for your frozen stash, knowing they will enhance your recipes with their delightful taste and vibrant color.
Other related questions
How do you defrost yellow tomatoes?
To defrost yellow tomatoes, remove the desired amount from the freezer and place them in the refrigerator overnight or for several hours until fully thawed. Alternatively, you can use the defrost function on a microwave, but be cautious to avoid cooking the tomatoes. Never defrost yellow tomatoes at room temperature, as this can lead to bacterial growth and compromise their quality.
Can you refreeze yellow tomatoes?
Refreezing yellow tomatoes is not recommended as it can significantly impact their quality and safety. Once tomatoes have been thawed, the cell structure breaks down, resulting in a mushy texture when refrozen. Moreover, the process of freezing, thawing, and refreezing can increase the risk of bacterial growth, potentially leading to foodborne illnesses. It is best to use thawed yellow tomatoes promptly and avoid refreezing them to preserve their taste and texture.
How do I know if the yellow tomatoes have gone bad after being frozen?
To determine if frozen yellow tomatoes have gone bad, look for signs of spoilage such as off-smell, mold growth, or an unusual appearance, like a change in color or texture. If the tomatoes appear mushy, slimy, or have an off-putting odor, it’s best not to use them. Properly stored, frozen yellow tomatoes should maintain their quality for 8 to 12 months, so if they show signs of spoilage before this timeframe, discard them to avoid any potential foodborne illnesses.
Can frozen yellow tomatoes be used in various recipes, such as sauces or soups?
Yes, frozen yellow tomatoes can be used in various recipes, such as sauces or soups. Thaw the frozen tomatoes in the refrigerator before incorporating them into your desired dish. Whether you’re making tomato sauce, soup, or a flavorful pasta dish, frozen yellow tomatoes can add a burst of bright color and a slightly sweet taste to your culinary creations.
Can frozen yellow tomatoes be used for making tomato puree or passata?
Yes, frozen yellow tomatoes can be used for making tomato puree or passata. Thaw the frozen tomatoes in the refrigerator before processing them into a smooth puree or passata. The vibrant color and sweet flavor of yellow tomatoes will enhance the taste of the puree, making it a delightful addition to your sauces, soups, and other culinary creations.
Can you freeze yellow tomatoes that have been used in salads or gazpacho?
It is not recommended to freeze yellow tomatoes that have been used in salads or gazpacho. Tomatoes used in salads or gazpacho are usually raw and have a high water content, which can lead to a mushy texture when thawed. Freezing may also affect the taste and overall quality of the tomatoes used in these fresh preparations. It’s best to enjoy salads and gazpacho with freshly harvested yellow tomatoes for the best taste and texture.
Can you freeze yellow tomatoes with added sugar or sweeteners for a dessert topping?
Freezing yellow tomatoes with added sugar or sweeteners for a dessert topping is not recommended. Tomatoes are naturally low in sugar and freezing can affect their texture and taste, making them unsuitable as a dessert topping. If you want to use yellow tomatoes in a dessert-like context, consider making savory-sweet tomato-based sauces or chutneys instead, which can complement certain desserts or main dishes.

