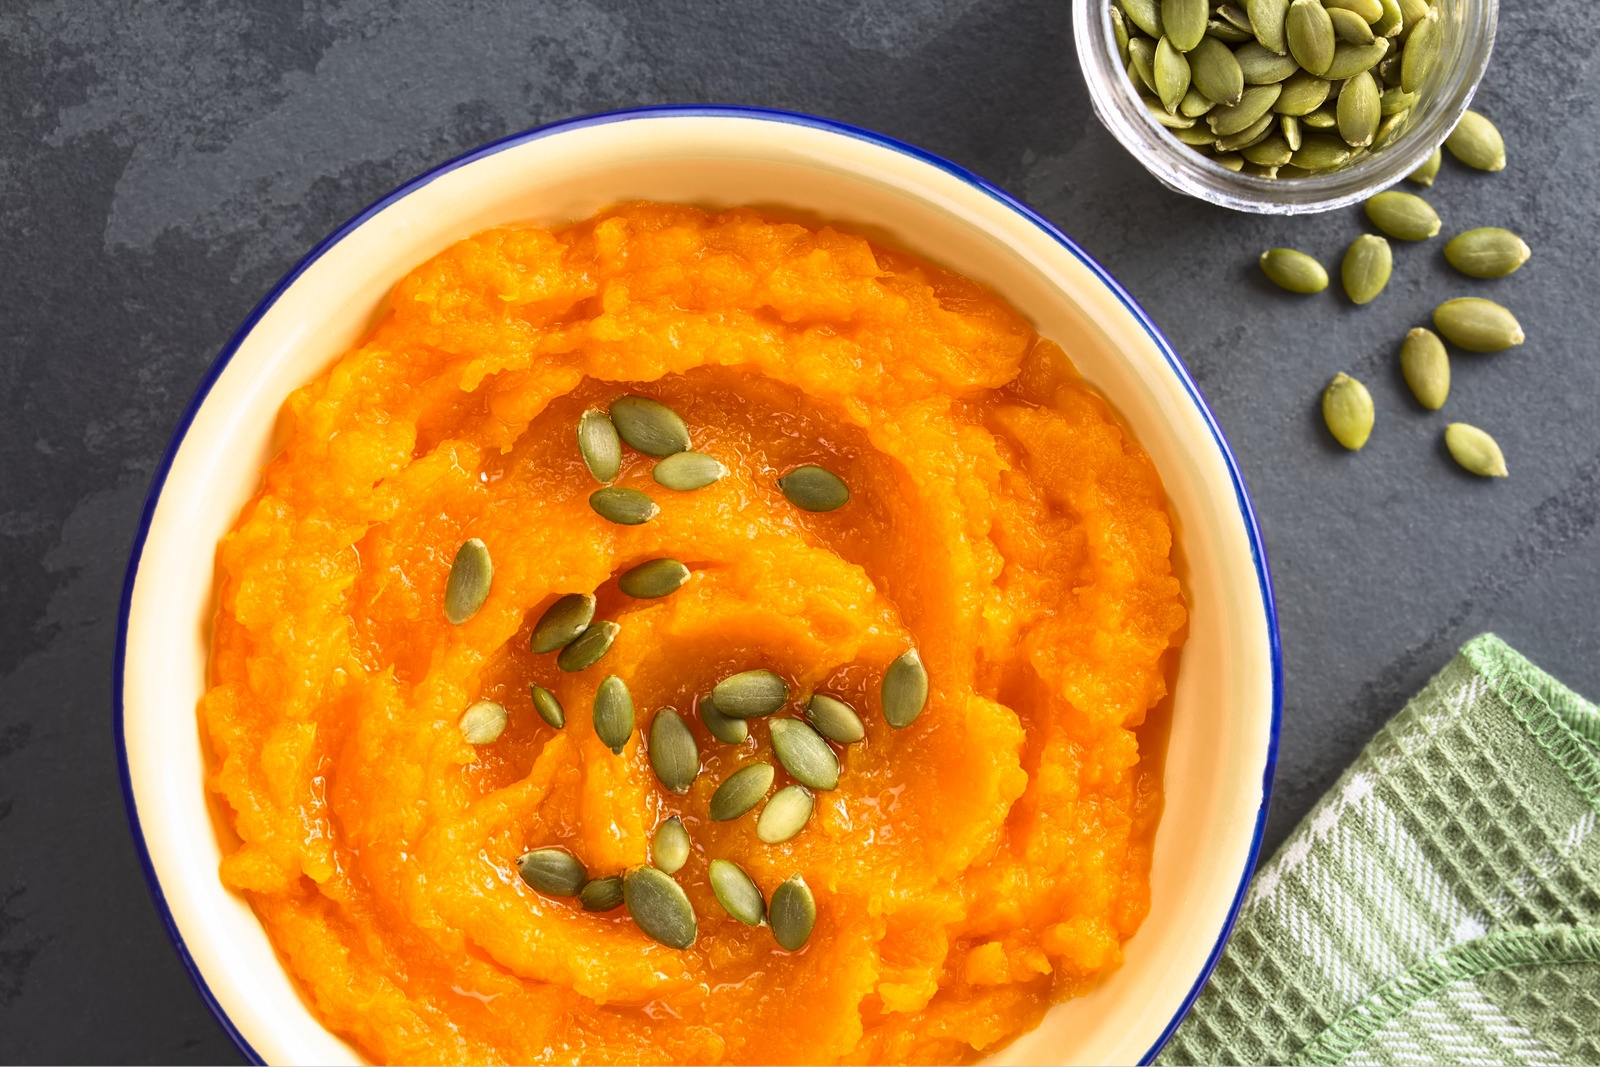
Pumpkin puree, with its smooth and velvety texture, is a versatile ingredient that captures the essence of autumn’s bounty. Made from roasted or steamed pumpkin flesh, this creamy and nutrient-rich base serves as the heart of various delightful recipes. From classic pumpkin pies and spiced lattes to soups, muffins, and pancakes, pumpkin puree adds a delightful dose of seasonal flavor and natural sweetness to a myriad of dishes. However, during the peak of pumpkin season, when an abundance of this golden puree is available, freezing becomes a practical and efficient method to preserve its freshness and extend its usability throughout the year. In this guide, we will explore the best techniques for freezing pumpkin puree, ensuring that its rich taste, creamy consistency, and nutritional benefits are lovingly retained, ready to infuse your culinary creations with the essence of autumn, even when fresh pumpkins are no longer readily available.
Here are the simple steps to freeze pumpkin puree:
Step 1: Prepare and Cook the Pumpkins
This initial step is crucial to ensure that you have high-quality pumpkin puree with a delightful flavor and smooth texture. To begin, it is essential to choose fresh and ripe pumpkins for the best results. Sugar pumpkins or pie pumpkins are highly recommended for making pumpkin puree because they have a sweeter and more tender flesh compared to other varieties, which enhances the overall taste of the puree.
Once you have selected the perfect pumpkins, the first task is to give them a thorough wash to remove any dirt or debris that might be on the skin. This step is vital as it prevents any unwanted particles from ending up in your pumpkin puree, maintaining its purity and taste.
You’ll need to cut the pumpkins in half. A sharp knife works best for this task. Be cautious and take your time while cutting to ensure safety. Once the pumpkins are halved, you’ll notice the inner cavity filled with seeds and stringy pulp. These components are not desired in the final puree, so it’s essential to scoop them out. You can use a spoon or a scoop to remove the seeds and pulp from the center of each pumpkin half.
Before proceeding to the cooking process, preheat your oven to 375°F (190°C). This temperature provides an ideal environment for roasting the pumpkin halves to perfection.
Now, place the pumpkin halves on a baking sheet, cut side down. The baking sheet will collect any juices that may be released during roasting, making the cleaning process easier and preventing the pumpkins from sticking to the sheet.
Roast the pumpkin halves in the preheated oven for approximately 45 to 60 minutes. The exact cooking time may vary depending on the size and type of pumpkins you are using. The aim is to cook them until the flesh becomes tender. You can check for doneness by inserting a fork into the flesh; it should slide in easily when they are fully cooked.
Roasting the pumpkins is a vital step as it not only softens the flesh, making it easier to puree but also enhances the natural sweetness and flavors through caramelization. This will contribute to the overall taste and quality of the pumpkin puree.
Once the pumpkin halves are cooked to perfection, you can move on to the next steps of turning them into a smooth and velvety pumpkin puree that will be ready for freezing or using in a variety of delicious recipes.
Step 2: Scoop out the Pumpkin Flesh
After the roasted pumpkin halves have been taken out of the oven, it’s essential to let them cool down before proceeding to this step. Handling hot pumpkins can be dangerous and might also affect the texture of the pumpkin flesh during blending.
Once the pumpkin halves have cooled to a safe temperature, it’s time to extract the soft and tender flesh from the skin. A spoon is the perfect tool for this task, as it allows you to gently scoop out the pumpkin flesh without damaging it. Take your time and be careful not to include any burnt or tough bits from the skin.
The skin, which should now be empty after scooping out the flesh, can be discarded or composted. It no longer serves a purpose in the pumpkin puree-making process.
The next step is to prepare the pumpkin flesh for pureeing. You have two main options for achieving a smooth and creamy consistency: using a food processor or a blender. Both appliances are effective at breaking down the pumpkin flesh into a velvety puree, so choose the one that you find more convenient or have readily available.
Place the scooped-out pumpkin flesh into the food processor or blender. Depending on the amount of pumpkin you are processing, you may need to do this in batches to ensure efficient blending.
With the pumpkin flesh loaded into the appliance, start blending. The blades will work their magic, breaking down the pumpkin and transforming it into a smooth and uniform puree. The length of time required for blending can vary depending on the power of your appliance and the amount of pumpkin being processed. For smaller batches, it might only take a few minutes, while larger quantities might require a bit more time.
The goal here is to achieve a silky and lump-free consistency, so continue blending until the pumpkin puree looks smooth and creamy.
Once the puree reaches the desired consistency, you are ready for the final steps in the freezing process. If you don’t plan to use the pumpkin puree immediately, you can proceed to package and freeze it to preserve its freshness and flavor for future culinary endeavors.
It’s worth noting that freshly made pumpkin puree can also be used immediately in recipes, such as pies, soups, smoothies, or baked goods, adding a wonderful autumnal flavor to your dishes. However, if you have more pumpkin puree than you can use right away, freezing it is an excellent way to extend its shelf life and ensure you can enjoy the delicious taste of pumpkin throughout the year.
Step 3: Portion the Puree
Now that you have your smooth and creamy pumpkin puree ready, it’s time to portion it before freezing. Portioning the puree allows for convenient and easy-to-use servings when you need them in your recipes later on.
First, decide on the portion size you would like for each container of frozen pumpkin puree. This will depend on how you plan to use the puree in your future recipes. Smaller portion sizes are great for recipes that require just a small amount of pumpkin, such as smoothies, sauces, or muffins. On the other hand, larger portions might be more suitable for recipes like pumpkin pies, soups, or casseroles.
If you opt for smaller portions, ice cube trays are a fantastic choice. The individual compartments in ice cube trays are typically the perfect size for small servings, making it easy to defrost just the amount you need without any waste. It’s recommended to use silicone ice cube trays as they allow for easy removal of the frozen pumpkin puree cubes once they are frozen.
Carefully fill each compartment of the ice cube tray with the pumpkin puree. You can use a spoon or a small ladle for this task to ensure that the puree goes into each compartment evenly.
For larger portions, you can use resealable plastic bags, plastic containers, or freezer-safe glass jars. If using plastic bags, lay them flat on a baking sheet or tray before adding the pumpkin puree. This will help prevent spills and make it easier to stack the bags neatly in the freezer once they are filled. Scoop the desired amount of pumpkin puree into each bag, leaving some room for expansion during freezing. Seal the bags tightly to prevent any air from getting in, which can lead to freezer burn.
Alternatively, if you prefer using plastic or glass containers, scoop the pumpkin puree into the containers, leaving some space at the top to account for expansion during freezing. Ensure that the lids or covers are securely fastened to maintain the freshness and quality of the puree.
By portioning the pumpkin puree appropriately, you can avoid the hassle of defrosting a large batch when you only need a small amount for a particular recipe. It also helps reduce food waste, as you can use just the quantity required for your dishes without thawing more than necessary.
Step 4: Seal and Package the Puree
After portioning the pumpkin puree into your preferred container, the next crucial step is to properly seal and package it for freezing. This step is essential to maintain the freshness, taste, and quality of the pumpkin puree during its time in the freezer.
For ice cube trays:
If you choose to freeze the pumpkin puree in ice cube trays, the first method to prevent freezer burn is to cover the trays with plastic wrap or aluminum foil. This extra layer creates a barrier that helps minimize the exposure of the pumpkin puree to air, which can lead to freezer burn over time. Simply place the plastic wrap or aluminum foil over the top of the ice cube tray and gently press it down to create a tight seal.
Alternatively, you can transfer the frozen pumpkin puree cubes into a resealable plastic bag. This method provides an additional layer of protection against freezer burn and allows for easy storage and organization in the freezer. Carefully remove the frozen cubes from the ice cube tray and place them into the resealable plastic bag. Squeeze out any excess air from the bag before sealing it tightly.
For larger containers:
If you opted for larger containers, such as plastic containers or freezer-safe glass jars, you can take a slightly different approach. Place a piece of plastic wrap directly on the surface of the pumpkin puree before closing the container with its lid. This direct contact between the plastic wrap and the puree helps reduce the amount of air that comes into contact with the puree, preserving its freshness and taste.
Regardless of the container size, make sure to seal it tightly to prevent air from entering, as exposure to air can cause freezer burn and adversely affect the quality of the pumpkin puree over time.
Additionally, it’s a good practice to label each container with the contents and the date of freezing. Proper labeling ensures easy identification in the freezer and helps you keep track of how long the puree has been stored.
Before placing the containers in the freezer, it’s essential to ensure that they are clean and free from any spills or drips. Wipe down the exterior of the containers to avoid any accidental sticking or difficulties in opening them later.
By sealing and packaging the pumpkin puree correctly, you are taking the necessary steps to maintain its flavor and texture, making it ready to be used in various recipes whenever you desire that delightful taste of pumpkin.
Step 5: Label and Date the Packages
Labeling and dating the packages of frozen pumpkin puree is a critical step to ensure efficient organization and optimal usage in the future. Properly labeled packages prevent confusion and help you keep track of the contents, freezing date, and storage duration.
Start by using a permanent marker or labels to clearly write the contents of each package, which in this case is “Pumpkin Puree.” This simple step will save you from guessing or opening each container to identify its contents when you’re ready to use the puree.
Next, write the freezing date on the package. This is important because, over time, frozen pumpkin puree can start to lose some of its flavor and quality. By knowing the freezing date, you can prioritize using the oldest packages first, ensuring that none of the puree goes to waste. Generally, pumpkin puree can be stored in the freezer for up to 3 to 6 months. Writing the date on each package allows you to monitor the duration of storage and plan your usage accordingly.
Additionally, if you have multiple containers or bags of frozen pumpkin puree with different freezing dates, the labels help you easily identify which ones have been stored longer and should be used sooner. This practice helps you maintain the best quality of the puree and avoids any unpleasant surprises when using it in your recipes.
Proper labeling also comes in handy when you’re planning your meals or dishes ahead of time. It allows you to quickly see how much pumpkin puree you have available and whether you need to defrost more for upcoming recipes.
To further enhance the organization, consider keeping all the labeled packages together in one designated area of the freezer. This dedicated space makes it easier to locate the frozen pumpkin puree whenever you need it.
Taking the time to label and date each package of frozen pumpkin puree is a simple yet essential practice. It helps you avoid confusion, prioritize usage based on storage duration, and maintain the best quality of the puree for all your culinary creations. By following this step, you can make the most of your homemade pumpkin puree and enjoy its delicious flavor throughout its freezer storage period.
Step 6: Store in the Freezer
After properly sealing and labeling the packages of pumpkin puree, it’s time to store them in the freezer. The freezing process is crucial to preserving the freshness and quality of the puree until you’re ready to use it in your favorite recipes.
Start by placing the sealed packages of pumpkin puree in the freezer. Arrange them in a single layer on a flat surface, such as a baking sheet or a tray. Keeping the packages in a single layer ensures that they freeze quickly and evenly, allowing the pumpkin puree to retain its taste and texture effectively.
The initial single layer setup is particularly important during the early stages of freezing when the puree is still in a semi-liquid state. Placing the packages in a single layer prevents them from sticking together and makes it easier to handle them when you need to stack or organize them in the freezer.
Allow the packages to remain in the single layer until they are completely frozen. Depending on the quantity and size of the packages, this may take several hours or overnight.
Once the pumpkin puree is completely frozen, you can stack the packages to save space in the freezer. Stacking the packages helps maximize the storage capacity, allowing you to make efficient use of the available freezer space.
To stack the packages, carefully place one layer of frozen packages on top of another. Make sure to position them in a stable and balanced manner to avoid any accidental spills or damage to the puree packages. If you are using plastic bags, ensure that they are properly sealed to prevent any potential leaks or contamination.
While stacking the packages is a great space-saving strategy, try not to stack them too high to avoid excessive pressure on the lower packages, which could potentially lead to crushing or bursting.
Remember that the freezer temperature should be set to 0°F (-18°C) or lower to maintain the quality and safety of the frozen pumpkin puree. Consistent and stable freezing temperatures help to retain the flavor and nutritional content of the puree throughout its storage period.
By keeping your frozen pumpkin puree in excellent condition, ensuring you always have this delightful ingredient at hand for your cooking and baking adventures.
How long can pumpkin puree last in the freezer?
Pumpkin puree can last in the freezer for approximately 3 to 6 months when stored properly in airtight containers or resealable bags. Freezing maintains the quality and taste of the puree, allowing it to be used for various recipes even outside the pumpkin season. Proper labeling with the freezing date is recommended to help track the storage duration and prioritize usage of the oldest packages first.
Other related questions
How do you defrost pumpkin puree?
To defrost pumpkin puree, transfer the frozen package from the freezer to the refrigerator. Allow it to thaw slowly and safely in the refrigerator for several hours or overnight. Avoid using warm water or microwaving as rapid thawing can affect the texture and quality of the puree.
Can you refreeze pumpkin puree?
It is generally not recommended to refreeze pumpkin puree once it has been thawed. Each time the puree undergoes the freezing and thawing process, its quality and texture may deteriorate. To preserve the best quality, divide the pumpkin puree into portions before freezing to thaw only the amount needed for each use.
How do I know if the pumpkin puree has gone bad after being frozen?
To determine if frozen pumpkin puree has gone bad, first, check for any signs of spoilage, such as an off smell, mold, or unusual discoloration. Additionally, if the texture appears grainy, mushy, or separates into watery and solid parts, it may indicate spoilage. Always rely on your senses and best judgment; if in doubt, it is safer to discard the pumpkin puree to avoid potential foodborne illnesses.
Are there any special considerations for freezing roasted or cooked pumpkin puree?
When freezing roasted or cooked pumpkin puree, there are some special considerations to ensure optimal results. Firstly, allow the puree to cool completely before freezing to prevent condensation and freezer burn. Secondly, divide the puree into portion sizes that you commonly use in recipes to avoid thawing more than needed. Finally, use airtight containers or freezer bags, removing excess air to maintain freshness and prevent odors from seeping in the puree. Properly stored, frozen roasted or cooked pumpkin puree can be preserved for several months.
Can you freeze pumpkin puree with added sugar or sweeteners?
Yes, you can freeze pumpkin puree with added sugar or sweeteners. However, keep in mind that sugar can affect the texture and consistency of the puree after freezing and thawing. To preserve the best quality, consider freezing pumpkin puree without added sugar or sweeteners, and add them when using the thawed puree in recipes. This will allow you to control the sweetness level and maintain the desired taste and texture.
Can you freeze pumpkin puree that has been seasoned with spices?
Yes, you can freeze pumpkin puree that has been seasoned with spices. However, it’s important to note that the spices may become more concentrated after freezing, potentially altering the flavor of the puree. To preserve the original taste, consider freezing unsweetened and unseasoned pumpkin puree, then add the spices when using the thawed puree in recipes. This ensures better control over the spice levels and maintains the desired flavor.

